Easy Gilded Design with Modello® Vinyl Wall Stencils
Modello® Design Stencils make creating gilded, metal leaf designs so fast and easy! This project was completed in about an hours and a half. Really!! You can use this same gilding technique with any vinyl stencil from our large Modello® Custom Stencil Collection. What are you waiting for? Get glowing.....

You will need:
- Metal Leaf for Gilding (can be loose, boxed Schaibin Leaf or book leaf)
- Royal Stencil Size in Red, Black or Clear
- Small foam roller and tray
- Lambswool Pad
- Clear or tinted wax
- Cheesecloth
- Painter’s Tape
Follow the Basic Modello® vinyl stencil installation instructions to apply the pattern to your surface.
Applying the Royal Stencil Size
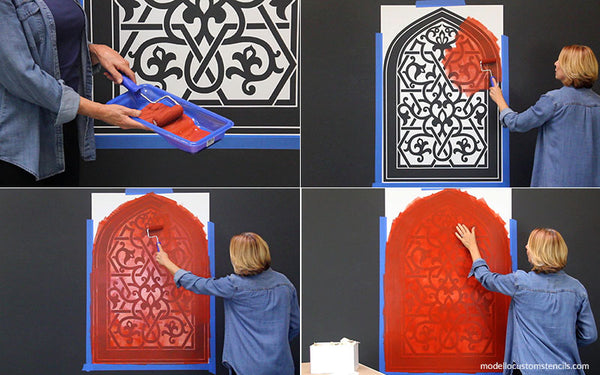
Run wide pieces of painter’s tape around the edges of the Modello® stencil to protect your background surface.
Burnish your Modello® stencil again just before beginning to ensure a tight seal.
Place Red Royal Stencil Size in a tray and load a small foam roller. Roll off excess size in the tray or on a piece of heavy paper.
Roll a thin, even coat of Red Royal Stencil Size overall. Allow the size to dry for approximately 15 minutes.
Roll on a second thin, even coat of Red Royal Stencil Size. This will ensure even coverage and give you a good, long open time. Allow the second coat of size to dry and come “to tack”. Wait a minimum of 20 minutes and up to 24 hours.
Gilding the Pattern with Metal Leaf
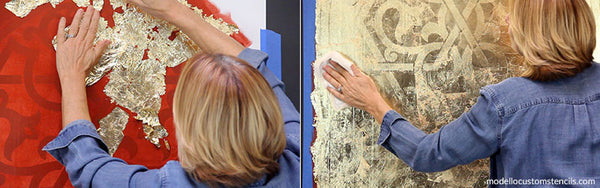
Apply the loose sheest of Gold Schaibin Leaf to the stencil design areas. Leave some open areas with the red gilding size showing through. When you smooth the leaf those areas will get filled in and this will give you more of a distressed, textural look.
After you complete the gold leaf application, burnish it well with a piece of lambs wool or soft cotton cloth.
Use a very firm pressure as you burnish to remove the excess leaf and fill in any open areas with loose leaf bits. Burnish overall again to make sure the leaf is pushed well into the edges of the open pattern.
Protect and Seal Your Stencil Design
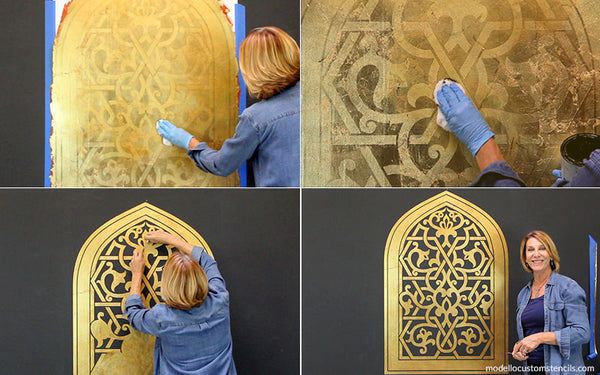
You can wait until the following day, or if you choose, you can seal it immediately with wax and cheesecloth. Wear gloves to protect your hands.
Using a hard pressure will cause the freshly gilded surface to distress a little more. Be careful not to press too hard or you could damage sensitive areas, especially if you are waxing right away.
You can remove the Modello® stencil immediately after the wax dries up a bit.
Use the weeding tool that comes with your order to pick out smaller design elements. Take care not to dig into your surface with weeding tool. Just use it to lift the edge of the Modello® stencil pieces.
Enjoy your masterpiece!