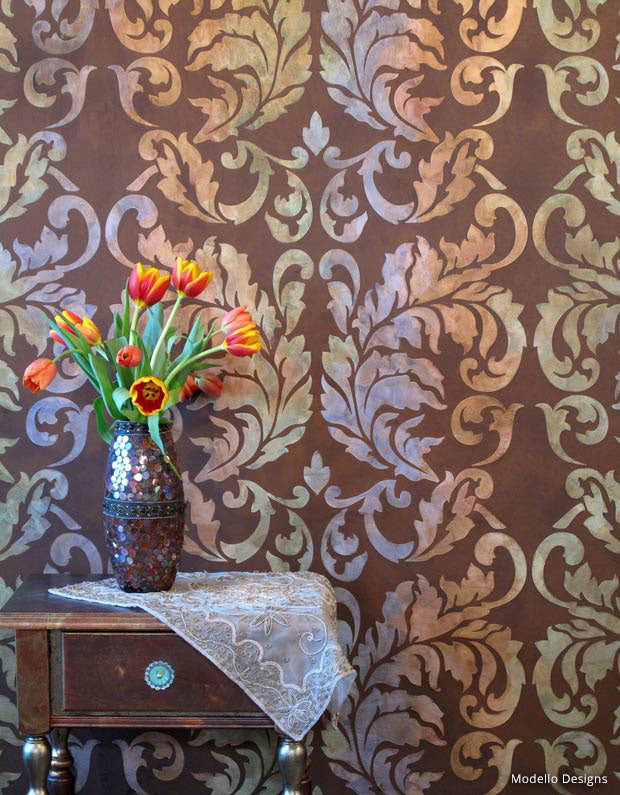
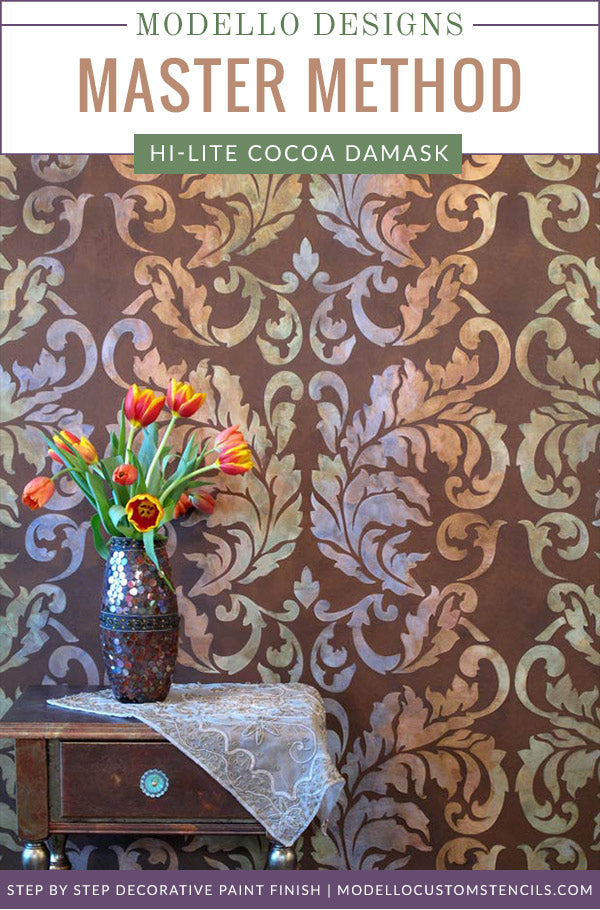
Iridescent Plaster Damask Feature Wall Finish
An over-scaled Damask pattern makes a chic design statement on an accent wall. Modello® vinyl stencils make it SO easy to create a color shift within the pattern as you trowel on iridescent plasters that play with the light.
- RDS Fabric Damask 724: Contact Modello® Stencils customer service to order this design.
Faux Effects International® Products: Order via our Affiliate Link Here
- Lusterstone Espresso
- Stain and Seal American Walnut
- Aqua/Mastercreme
- So Slow Super Extender
- StucoLux Metallics: Pale Gold, Rich Gold, HiLite Blue/Orange/Red/Green
Tools: Order via Royal Design Studio Here
- Japanese Trowel
- Japan Scrapers or Colour Shaper
- Soft Rubber Trowel
- Cheesecloth
Basecoat: Dark Brown or Black
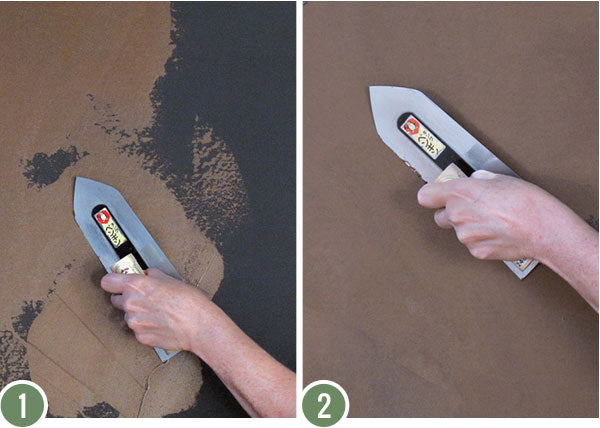
Step 1: Use a Japanese Trowel to apply a skim coat of Espresso Lusterstone overall. Apply this in a thick/thin manner so that a small amount of your base color remains showing through. Allow to dry.
Step 2: Repeat Step 1, filling in areas now that were left “thin” on the first layer. Pull the material tightly and use a high angle on your trowel to burnish the material as you work. Allow to dry.
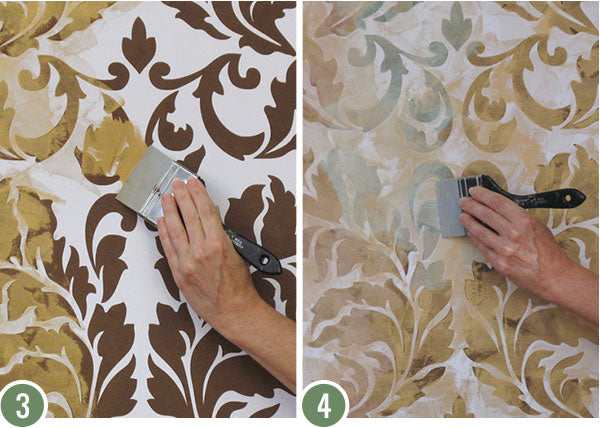
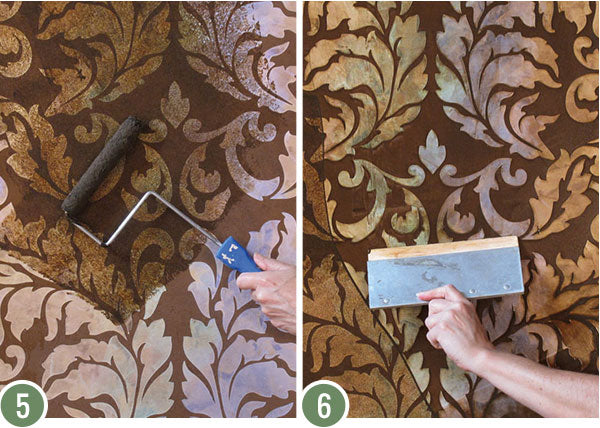
Step 3: Apply your Modello® pattern. Use a Japan Scraper or Colour Shaper Tool (recommended) to apply Pale Gold StucoLux to all pattern areas to cover about 75%. Change the direction of your hand and your pressure as you work to create a skip-trowel effect. Allow to dry.
Step 4: Add another layer in the same manner, now using Rich Gold StucoLux and filling in the design area 100%. Allow to dry.
Step 5: The next color layers will be applied to achieve the look of subtly blended 8-10” wide vertical stripes of color within the pattern. Use your Japan Scraper or Colour Shaper to apply “stripes” of HiLite Green, Orange, and then Blue. Allow the colors to intermingle at the point where they meet so that there is not a sharp delineation of color in those areas. Allow to dry.
Step 6: Repeat Step 5 to build up more depth of color, this time using Hilite Red over the Hilite Orange areas. Allow to dry.
Step 7: Repeat Step 5 again, if necessary, to develop more color depth. Use the HiLite Orange color again over the HiLite Red. Allow to dry and remove the Modello pattern.
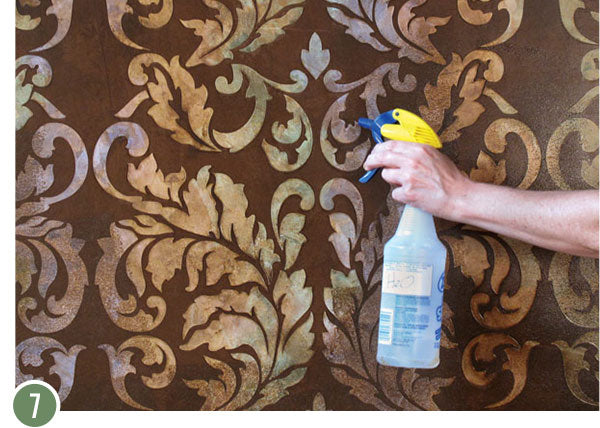
Step 8: Mix up some “Slo Crème” by combining 3 parts So Slo Super Extender with 1 part Mastercreme. Mix the Slo Crème 1:1 with American Walnut Stain and Seal. Apply liberally to the design area with a foam brush or roller and then use a Soft Rubber trowel to pull most of the stain out, leaving it pool around the design edges to accentuate them. Allow to dry and repeat.