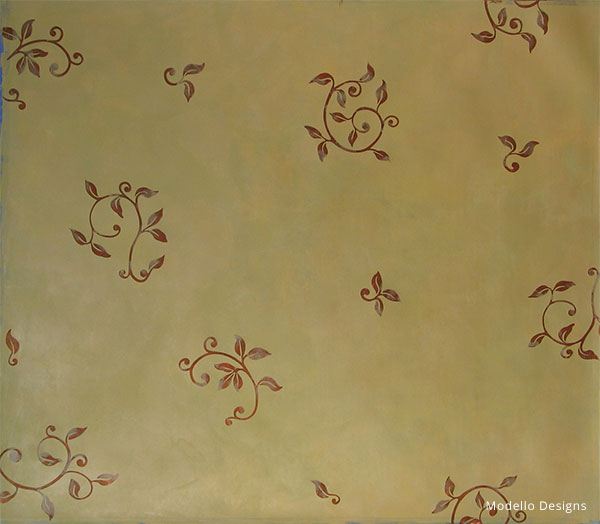
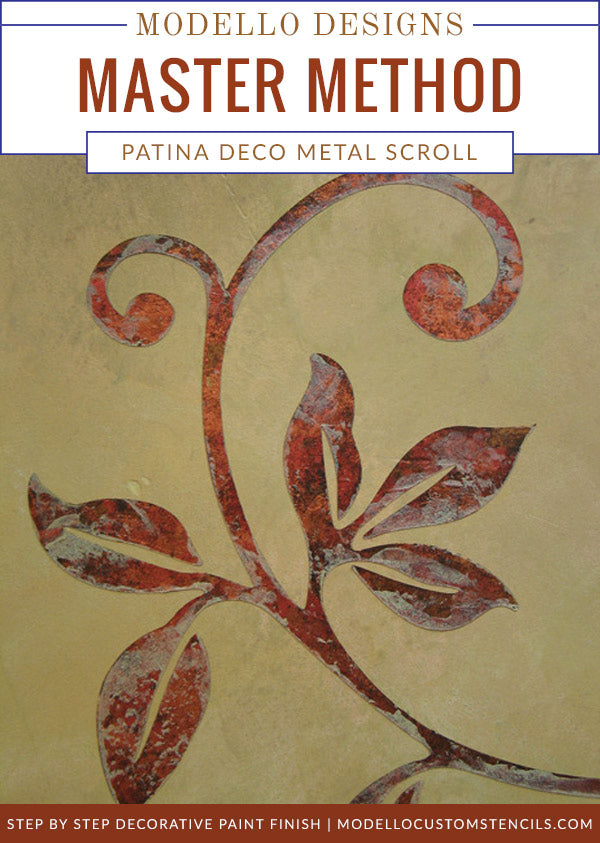
Metal Scrolls Patina Finish
Plaster and patina make the perfect combination! Use scroll stencils to create striking metallic accents on a soft verdigris plaster background.
- Modello Pronto! Scroll Set: Contact Modello® Stencils customer service to order this design.
Faux Effects, International® Products: Order via our Affiliate Link Here
- Lusterstone: Antique Parchment, Green Onyx, Mustard Seed
- Palette Deco: Bronze, Metallic Red, Copper
- Stain and Seal: Antique Mahogany
- Aquacreme
- Aquacolor: Van Dyke Brown
Tools and Materials: Order via Royal Design Studio Here
- Venetian Trowel
- Japan Scraper
- Sea Sponge
Basecoat: Off White Aquabond

Step 1: Trowel a thin skim/base coat of Antique Parchment Lusterstone over your entire wall surface. Change the direction of your hand often as you work to create an organic look. Let dry.
Step 2: Apply another trowel layer of Antique Parchment, this time “finessing” the material a little more to create more subtle movement within the finish. Keep your trowel at a very low angle and again change the direction of your hand often. Let dry.
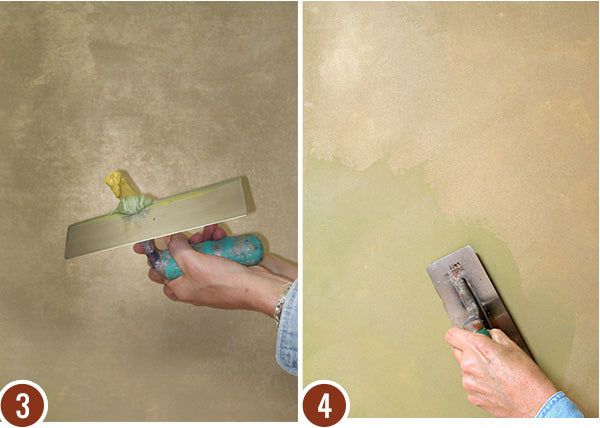
Step 3: Mix some Antique Parchment and Mustard Seed Lusterstone together at a 1:1 ratio. To this color mix add about 20% Aquacreme. Add about 20% Aquacreme also to a separate container of just Green Onyx. Double-load your trowel with small amounts of the two separate color mixes, using slightly more green than yellow.
Step 4: Working in small areas at a time, trowel the two color simultaneously to the Antique Parchment background. Work quickly and use a harder pressure and change of direction to blend the colors slightly on the surface. The addition of Aquacreme to the Lusterstone will create more translucency and also allow for more working/blending time.
Color Blending Tip: An alternative to using a double-loaded trowel to apply multiple colors at once is to use a “wet-on-wet” technique. For this method you will apply one color in a small area and immediately trowel and blend in another color on top of it. You can also use a combination of the two methods, blending additional color on top of the double-loaded trowel effect to further soften the look.
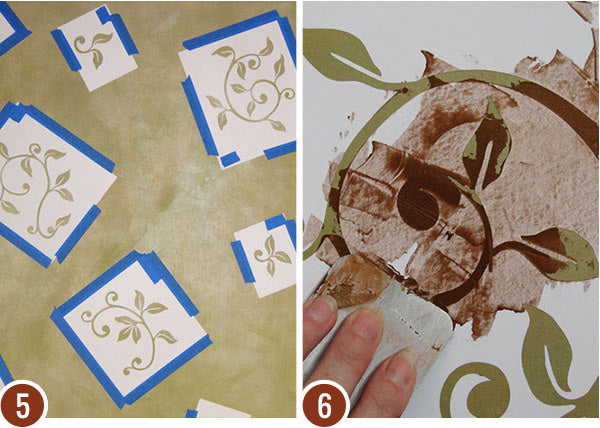
Step 5: When the Lusterstone background has completely dried, place the Modello® patterns in a random arrangement, offsetting the designs so that they do not line up horizontally or vertically. Additional tape is applied around the edges of the Modello® patterns to further protect the background. Note: on a larger wall area the designs can be placed much farther apart.
Step 6: Use a small Japan Scraper to blade on flat, random patches of Bronze Palette Deco. Hold the blade at a very shallow angle (almost flat) to the surface. Fill in about 70% of the design area.

Step 7: Immediately apply Metallic Red Palette Deco in the same manner to fill in some of the open areas and also to cover some of the Bronze areas.
Step 8: Repeat with the Copper Palette Deco to completely fill in the design area and immediately pounce into the wet Palette Deco lightly with a damp sea sponge. Alternatively to applying and sponging all colors at once, you could apply the different colors/sponge printing one at a time to each design.
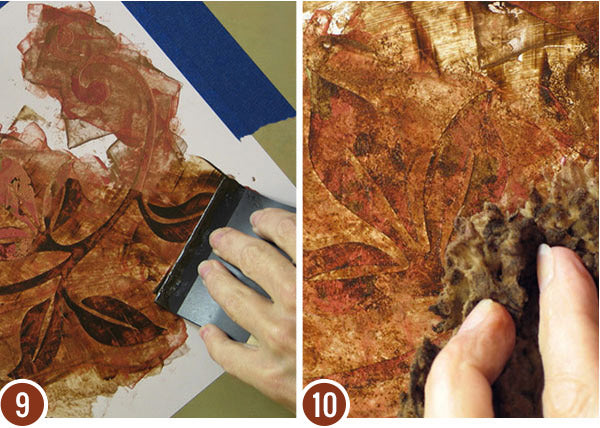
Step 9: Add about 20% Aquacreme to Antique Mahogany Stain and Seal to increase the translucency and extend the open time. Apply it through the design with a Japan Scraper.
Step 10: Immediately soften and remove the excess stain with a damp sea sponge. Let dry
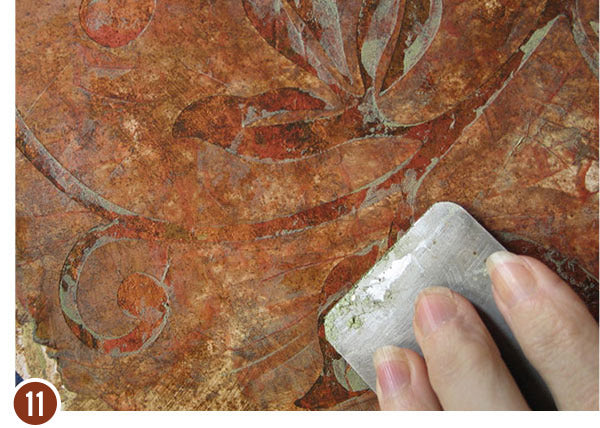
Step 11: A final touch, that helps to bring the background color into the design and create a unifying effect, is to blade a small amount of Green Onyx randomly through each design. This also creates a nice “patina” effect.