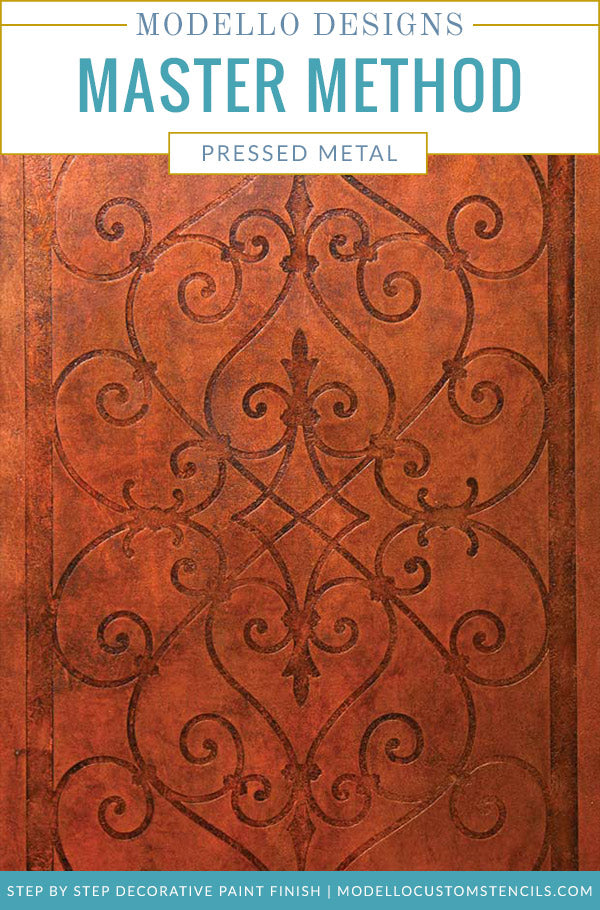
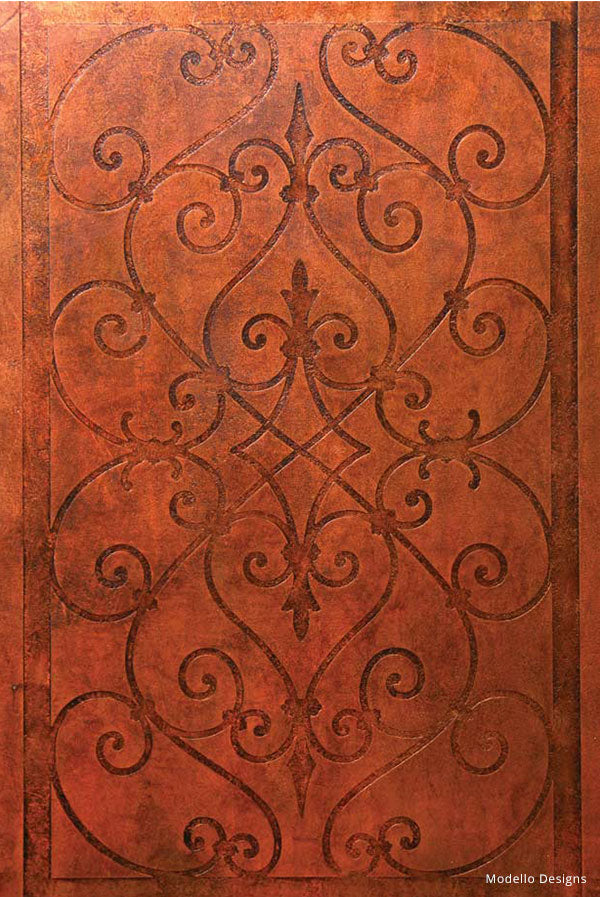
Faux Embossed Metal Decorative Finish
Use Modello® custom stencils and metallic plasters to create the look of a embossed metal finish. A great look for panels, door fronts, and even ceilings!
- Choose from our Custom Stencil Collection. Select (Reverse/Negative Weed) under Stencil Image Options. Contact Modello® Stencils customer service to order this design.
Faux Effects International® Products: Order via our Affiliate Link Here
- Palette Deco: Copper
- Lusterstone: Copper
- Stain and Seal: Antique Mahogany
- Aquaglaze
- Aquacreme
- Aquacolor: Van Dyke Brown
Tools: Order via Royal Design Studio Here
- Modern Masters Metallic Paint: Statuary Bronze, Copper
- Large Stipple Brush
- Venetian Trowel
- Soft Rubber Trowel
- Chip Brush
- Foam Brush
- Sea Sponge
- Small Bubble Level
- Ruler and Pencil
Base coat: Modern Masters Statuary Bronze
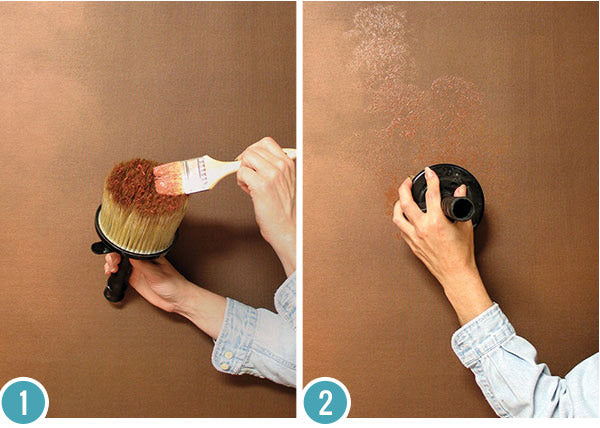
Step 1: Create a custom glaze with following recipe: 1C. Aquacreme, 2T. MM Metallic Copper. Use a chip brush to load the mixture onto the tips of an Ultimate Stippler. This applies just enough glaze to the brush and eliminates the need for “offloading”.
Step 2: In small, workable areas apply the glaze to the surface by first stippling it on. Immediately use the brush with a swirling, circular motion to distribute the glaze over the surface and blend it out. You should end up with a transparent and softly mottled copper “finish” over the bronze background. Let dry.
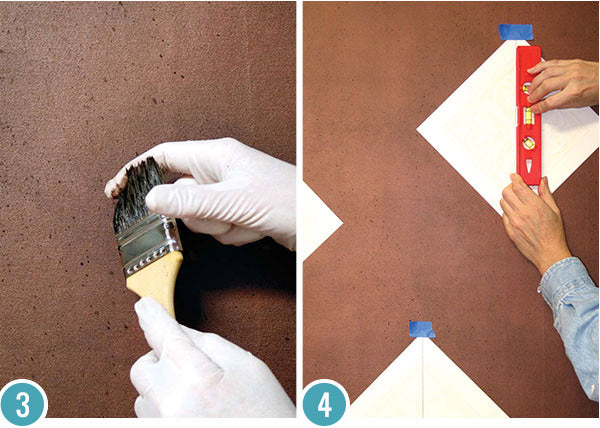
Step 3: Add further interest and texture with “flyspecking”. Thin Van Dyke Brown Aquacolor 1:1 with water. Load just the tips of a chip brush and spatter the surface with small drops of color by running your index finger quickly from the far edge of the brush towards you. Repeat in the same manner with the Metallic Copper.
Step 4: The Modello tile patterns are placed on the diagonal to make “diamonds”. In order to get them level, use a ruler and pen or pencil to draw a line directly on the Transfer Paper to connect opposite corners. Use a small bubble level to “plumb” the lines. Install the Modellos as usual according to the basic installation instructions.
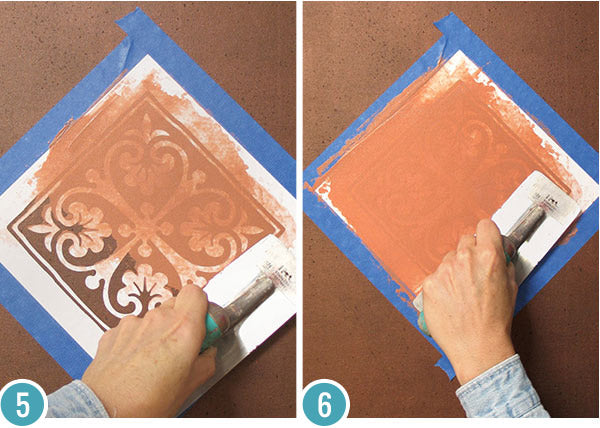
Step 5: Apply an additional band of blue tape around the edges of the Modello to further protect the background surface. Use a Venetian trowel to apply a thin, level, even coat of Copper Lusterstone through the design area. Let dry.
Step 6: Apply another thin layer of Lusterstone to even out and build up the embossing more. You can’t completely “bury” the design or you won’t be able to find it to remove it later! A slight ghosting of the Modello pattern showing through should still be visible. Let dry.
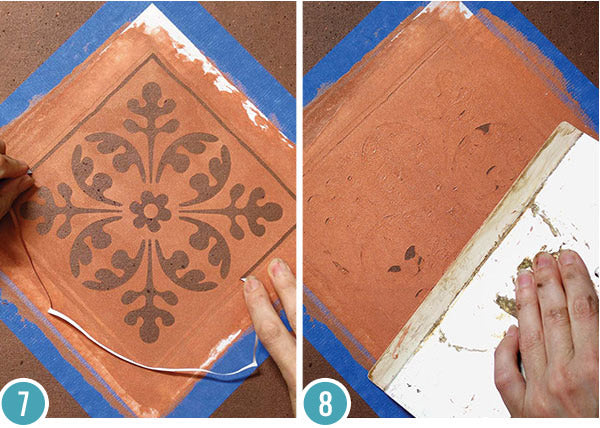
Step 7: Remove just the inner areas of the Modello masking pattern. Leave in place the outer band of white vinyl and the blue tape.
Step 8: Use a soft rubber trowel to apply a thin layer of Copper Palette Deco over the entire area. Competely cover the Lusterstone base and fill in the recessed design areas slightly. There should still be some recession in the design areas. If you can’t see the pattern you have applied the Palette Deco too heavily.
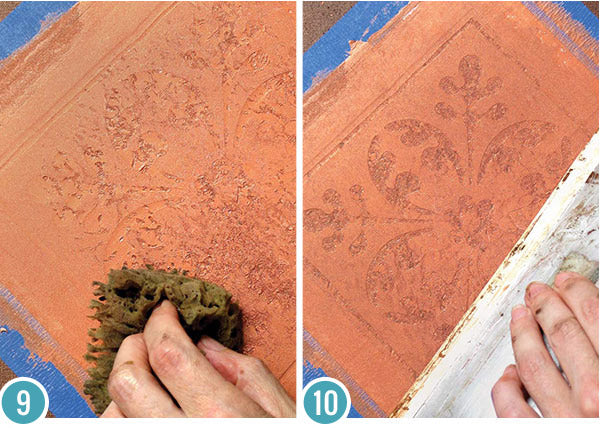
Step 9: Immediately the wet Palette Deco with a damp sea sponge to “print in” some texture. Press harder into the design areas to make them more pronounced.
Step 10: Immediately knock down the subtle texture slightly by dragging over it VERY lightly with a clean trowel. Palette Deco dries quickly so you will want to do this to each motif before moving on. Let dry.
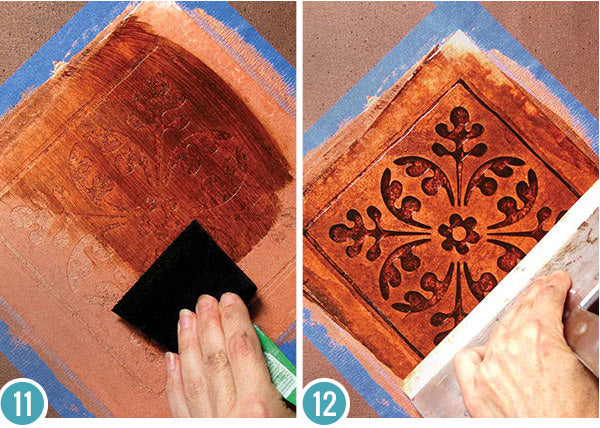
Step 11: Give the Antique Mahogany Stain and Seal more open time and translucency by adding about 20% Aquaglaze or Aquacreme. Brush on an even, healthy coat of stain with a foam brush, covering the tile completely.
Step 12: Immediately wipe off the excess stain by dragging over it with a soft rubber trowel. Use a hard pressure. The stain will settle into the slightly recessed areas of design and texture creating a dramatic look.
Alternate Design: This technique is also ideal for creating small architectural panels such as art pieces or use on door insets and range hoods. The Stain and Seal bites into the surface and dries quickly. On larger areas use heavily tinted Aquacreme glaze or add Aqua Extender to the mixture.
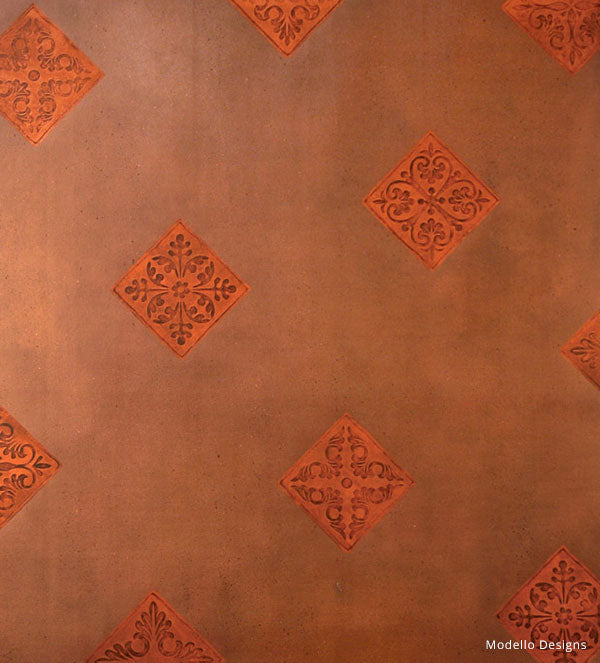
More inspiration: Terri Riesenman did a beautiful job using this technique with our custom Modello Stencils below.
