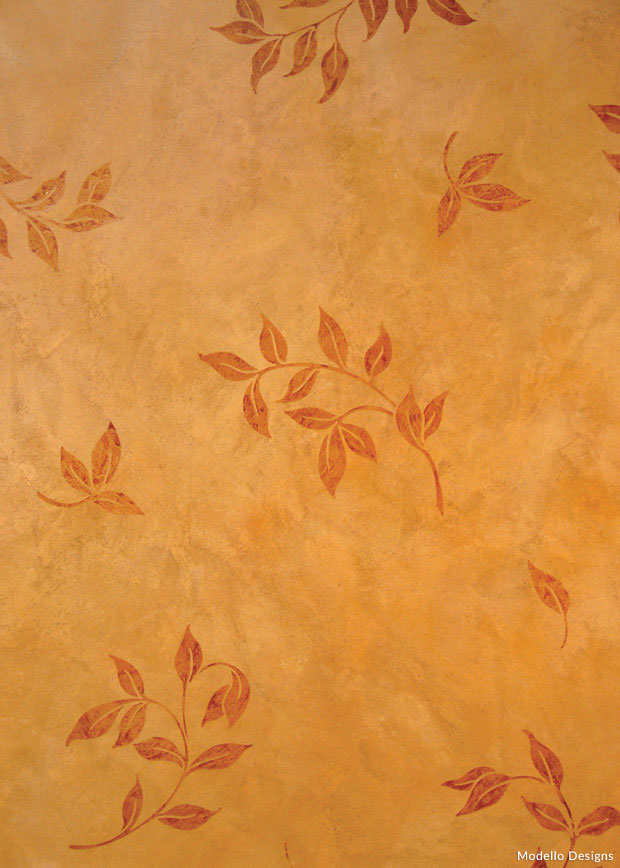
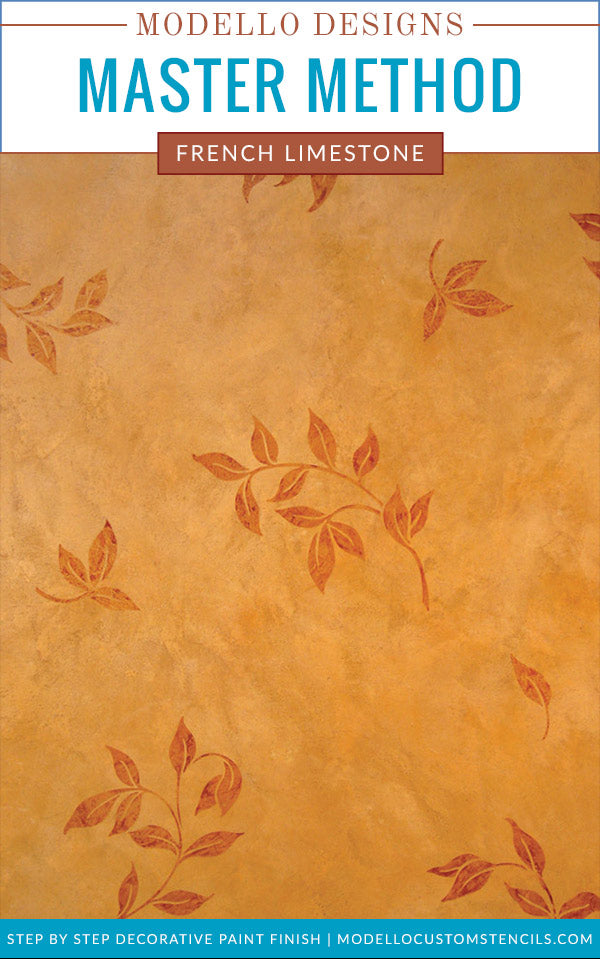
French Limestone Wall Finish
Inspired by French plaster walls in Provence. A soft, rich wall finish enhanced by subtly textured random leaf stencils.
Modello® Stencil: Contact Modello® Stencils customer service to order this design.
Faux Effects International® Products: Order via our Affiliate Link Here
- Untinted Plastertex
- Stain and Seal: Golden Oak, Rich Brown
- Aquawax
- Aquacreme
- Aquacolors: Yellow Ochre, Earth Brown, Sienna
Tools: Order via Royal Design Studio Here
- Venetian Trowel
- Japan Blades
- Neon Nylon Brush
Basecoat: Texture Coat
Special Note: Untinted Plastertex is a special Plastertex tint base that contains no Titanium White, allowing you to tint it to darker colors. The tinted mixture will become several shades darker when dry. You can expect to get approximately 250 sq. ft per gallon with the first texture layer and up to 400 sq. ft. per gallon with the smoother “backfill” layers.
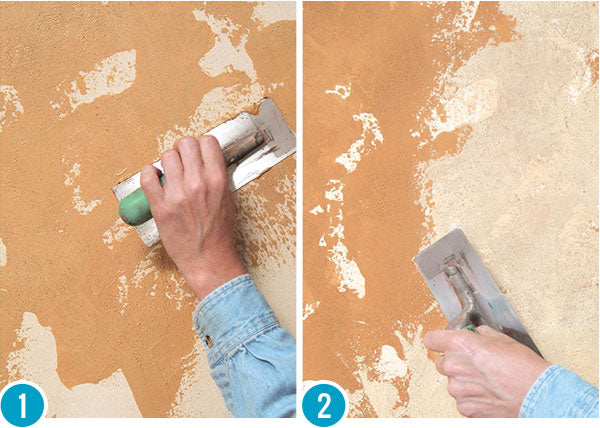
Step 1: Create a custom mix of Untinted Plastertex using the following recipe: 1 qt. Untinted Plastertex tinted with 3T. Golden Oak and 1tsp. Rich Brown Stain and Seal. Use a drill mixer to blend well. Skip-trowel over the Texture Coat base leaving about 10% of the background showing through in small, random patches. Let dry.
Step 2: Create a second color mix by following the above recipe but double the amount of Untinted Plastertex to 2 quarts. Use a very hard pressure and pull very tight on the trowel to “backfill” the textured areas created in the first layer. Let dry.
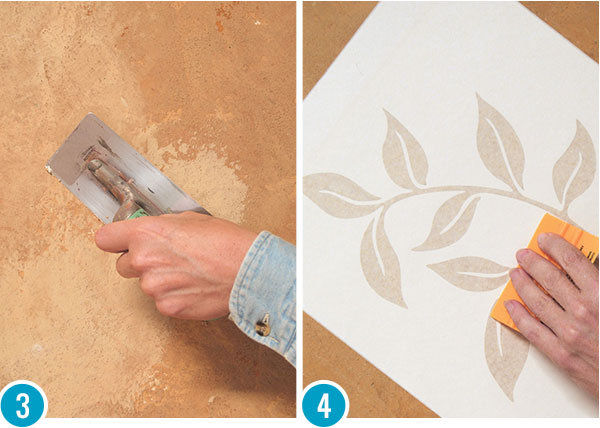
Step 3: Apply a second layer of the second, lighter mix. Pressing very hard and keeping a higher angle on the leading edge of the trowel will both burnish the material and emphasize the underlying texture. Let dry.
Step 4: Place the individual Modello® patterns in a random pattern on the wall. White mask is normally not suited for textured surfaces. However, because the Plastertex is burnished hard and smooth, 4 mil white mask can be used in this case. Burnish the Modello well to ensure a good bond.
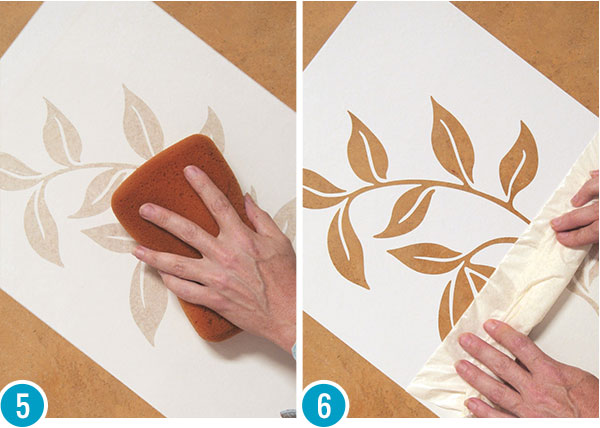
Step 5: Prior to removing the Transfer Tape, run a damp sponge over the surface. The moisture will absorb into the paper tape and allow it to release easier from the Modello® pattern.
Step 6: Remove the Transfer Tape by pulling it straight back onto itself at a 180-degree angle. Do this slowly to make sure that you do not pull any of the vein detail with it.
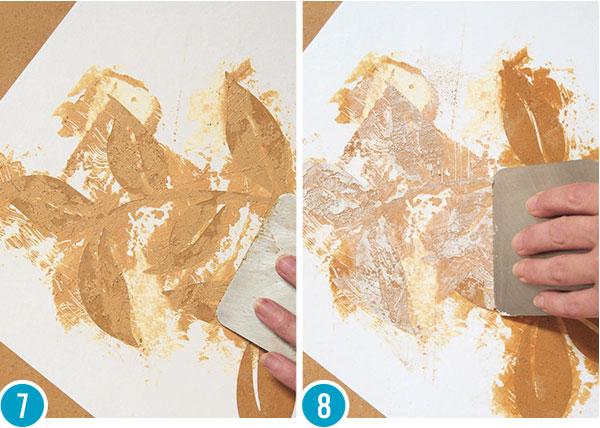
Step 7: Use the lighter Untinted Plastertex mixture to blade on a textured and “open” embossing layer. Note that the Japan scraper is held at an angle parallel to the surface. This aids in achieved the desired open texture and also helps to prevent “scratch marks’ that can be caused by the aggregate in the Plastertex. Let dry.
Step 8: Now use a very hard pressure and “backfill” again over the texture with plain Untinted Plastertex. Note that the angle of the blade in this case is more perpendicular to the surface-pushing the material into the nooks and crannies. Let dry.
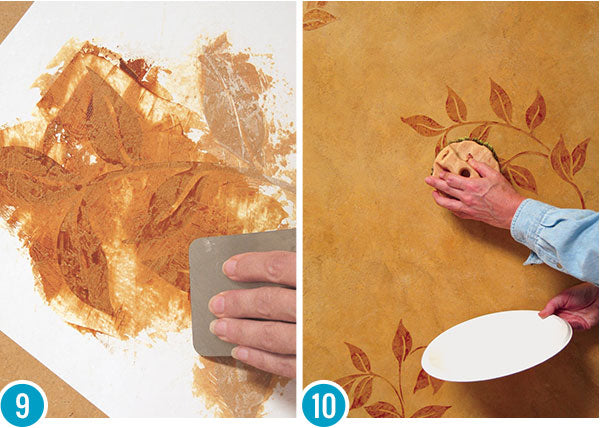
Step 9: Stain and Seal water-based gel stains are ideal for toning Plastertex and other finishes. Use the Japan scraper again to trowel on Golden Oak Stain and Seal. The stain will settle into the slightly recessed areas. If desired, remove some excess and soften with cheesecloth. Let dry and remove stencils.
Step 10: It is not necessary, but provides a nice smooth finish and sheen to seal the surface with a thin layer of Aquawax. Simply load a neon nylon brush with wax (a plastic plate works well) and rub onto the surface with round strokes. Let dry.
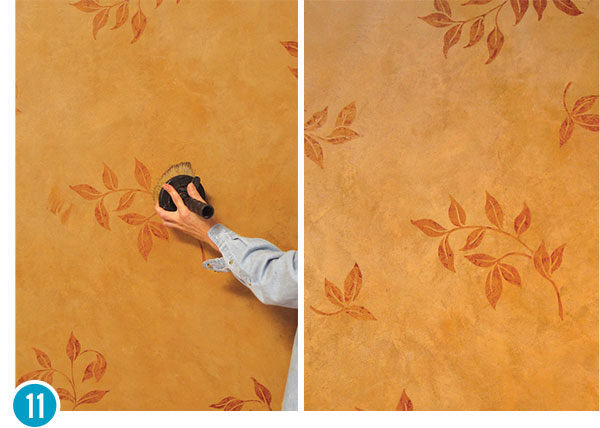
Step 11: If a richer, deeper color is desired, use an Ultiimate Stippler to rouge on a layer of tinted Aquacreme. This will look even richer over the wax layer. For a golden yellow color follow this recipe: Tint 1C. Aquacreme with 2 tsp. Sienna, 1 tsp. Yellow Ochre and ½ tsp. Earth Brown.