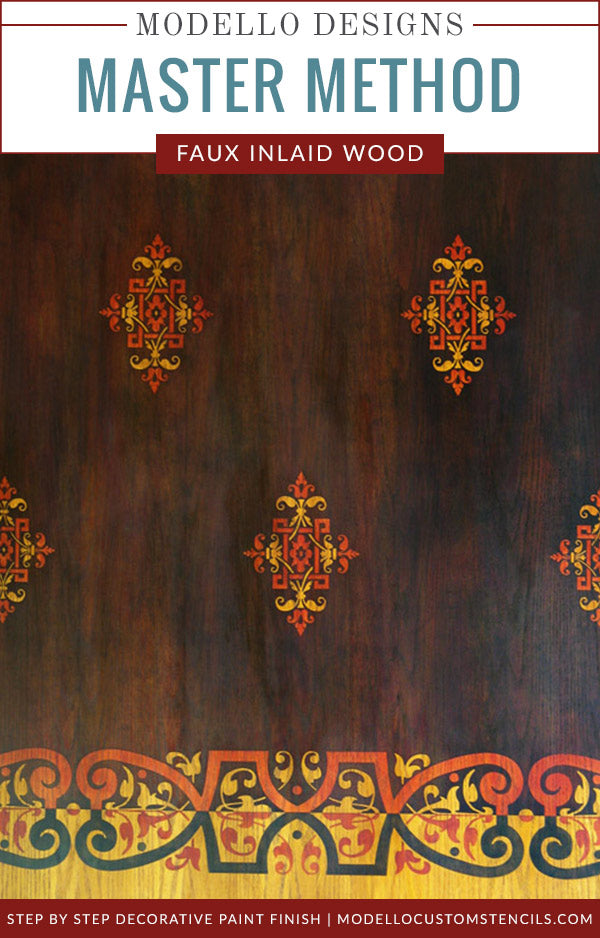
How to Stencil Faux Inlaid Wood Designs
Learn how to easily create the look of expensive faux marquetry patterns in wood using Modello® stencils and water-based wood stains. A gorgeous look for floors, cabinetry, panels, ceilings, stair risers, and furniture!
- Interlaced Diamond (4mil, negative weed): Contact Modello® Stencils customer service to order this design.
Faux Effects International® Products: Order via our Affiliate Link Here
- Stain and Seal: Golden Oak, Antique Cherry, Ebony, Rich Brown
- Aquaglaze
- FX Thinner
Tools: Order via Royal Design Studio Here
- 4” nylon rollers and trays
- Cheesecloth
- Staining Pad
- 220-grit Sandpaper
Surface Considerations: This technique is for unstained and unsealed wood. This sample is done on oak plywood, but it works best on woods that have a tight grain with little pattern such as some oaks, birch, alder and poplar. You can use this technique on wood floors, tabletops, cabinet door panels, crown molding, wood beams, coffers and wainscoting.
Design Tips: This technique must be used with “negative weed” Modellos and is best suited to strong, graphic patterns in which the design elements are separated into obvious and distinct groups. It requires the use of three stain colors: One light, one dark and one medium. The lightest color will be applied to the base. After applying the Modellos the darkest color will be applied. Then some of the design elements are removed and the medium value color is applied. This color will cover the areas of lighter color and simply tone the darker color because these are translucent “stains”, not “paint”.
Surface Prep: A good way to prepare your wood surface is to “condition” it with a coat of FX Thinner, brushed or rolled on. When dry, sand lightly with 220-grit sandpaper and wipe clean.
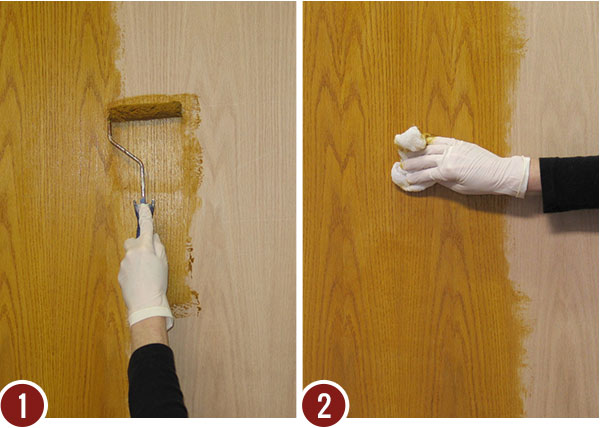
Step 1: Thin and extend the open time of the Golden Oak Stain by adding 25% Aquaglaze or FX Thinner. The glaze will create a medium with a lot of “body”. The FX Thinner will create a more “watery” medium, which is fine to use on this first layer. Roll or brush on the thinned stain in workable areas, following the grain of the wood.
Step 2: Wipe off the excess stain with cheesecloth as you work, again going in the direction of the grain. If you are doing this technique in a large area it is suggested that you keep a “wet leading edge” and/or have someone assisting you. Stain and Seal dries fairly quickly. If the grain has been raised, sand lightly and wipe again.
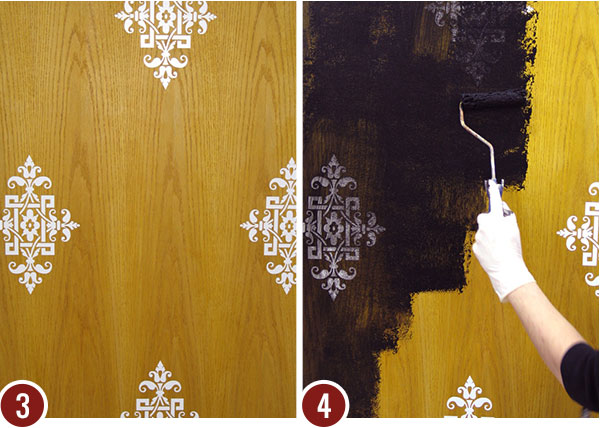
Step 3: Place the Modello® stencils on the surface according to the basic instructions. In this case, a formal grid or half-drop arrangement was done on the surface. Be sure to burnish the Modello® stencils well after installation.
Step 4: Roll or brush on Ebony Stain and Seal that has been thinned with 20% Aquaglaze. Use Aquaglaze on these layers as opposed to FX Thinner as you do want to maintain the gel consistency of the glaze to prevent seepage under the pattern.
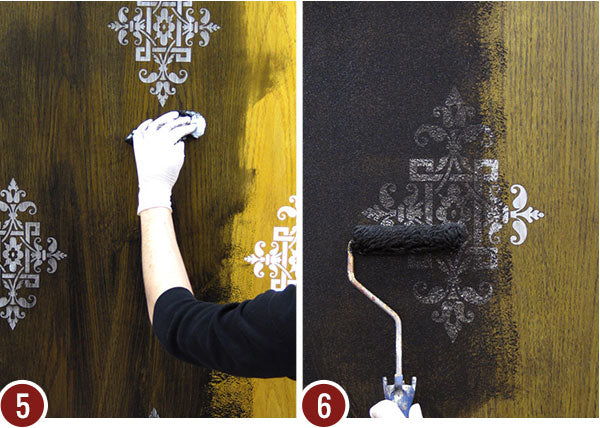
Step 5: Wipe off the excess stain with cheesecloth as you work using long, sweeping strokes. Aim for consistency in coverage. Let dry.
Step 6: To deepen the stain color, repeat with a second coat. Each layer of stain will seal the wood slightly, so you will notice that with each layer of stain you will have more working time. Let dry.
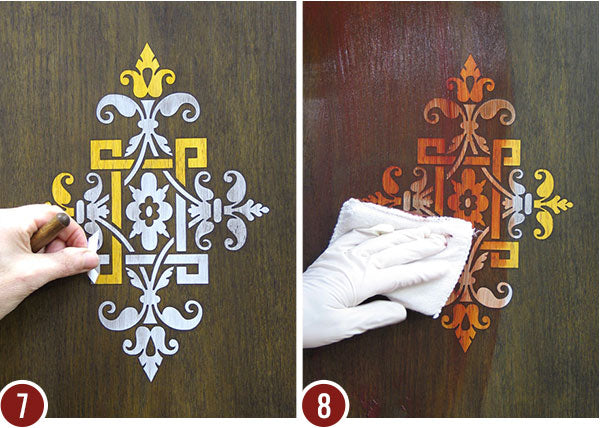
Step 7: Use a weeding tool to help you remove the areas of the design which you would like to receive the Antique Cherry red stain. This is a subjective, artistic decision that will vary with the type of design chosen.
Step 8: Roll or brush on a thin coat of Antique Cherry Stain and Seal that has been thinned 20% with Aquaglaze over the whole surface. Alternatively, you could use a terry cloth staining pad to apply the stain. As you wipe off the excess with cheesecloth or a stain pad you will see that the Cherry color tones, warms and richens the color of the Ebony. Let dry.
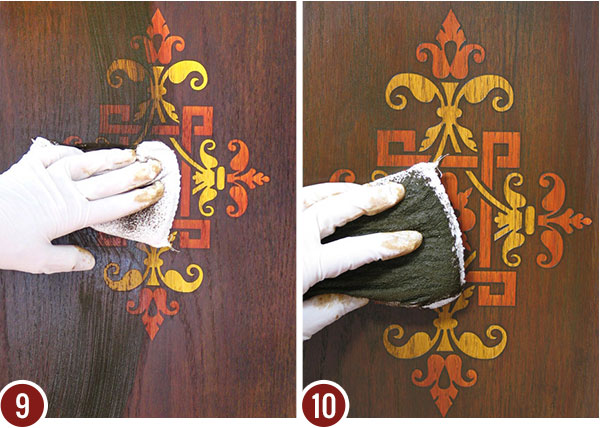
Step 9: Remove the remaining Modello pattern (not shown). Thin Rich Brown Stain and Seal with 30% Aquaglaze or FX Thinner and use as a toning layer over the whole surface. The Rich Brown color will tone the harshness of the Golden Oak and unify all of the colors on the surface.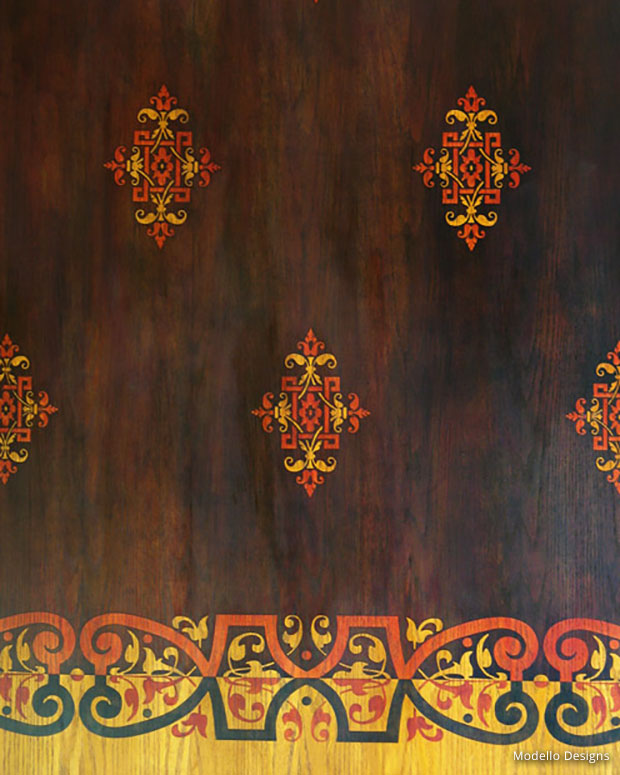
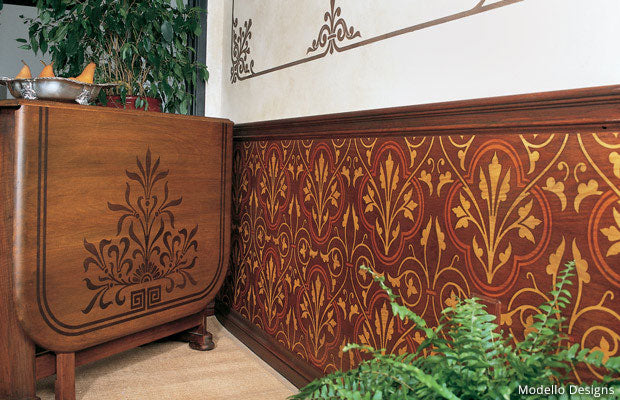
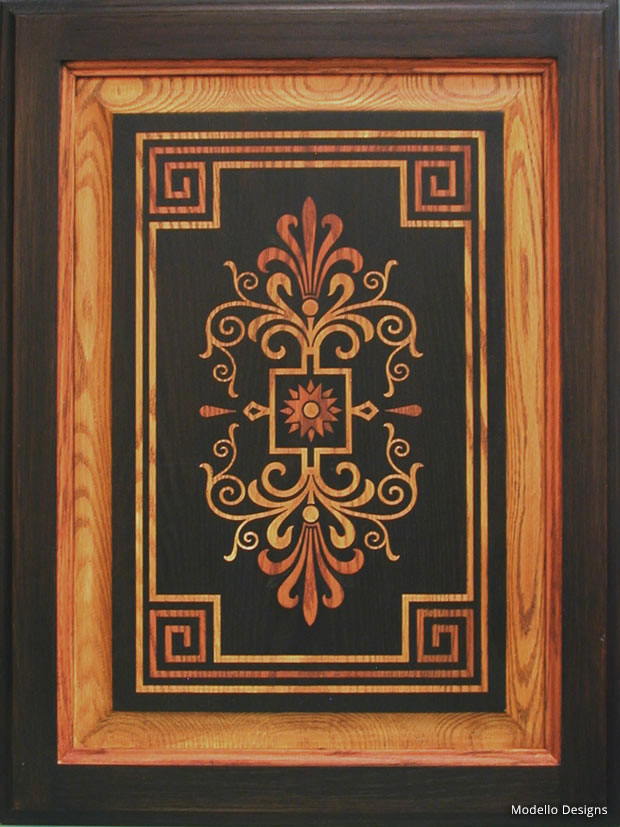
More inspiration: Our in-house designers and Karen Jorgenson did a beautiful job using this technique with our custom Modello® Stencils below.